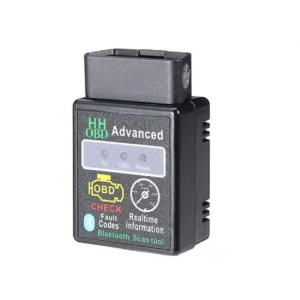
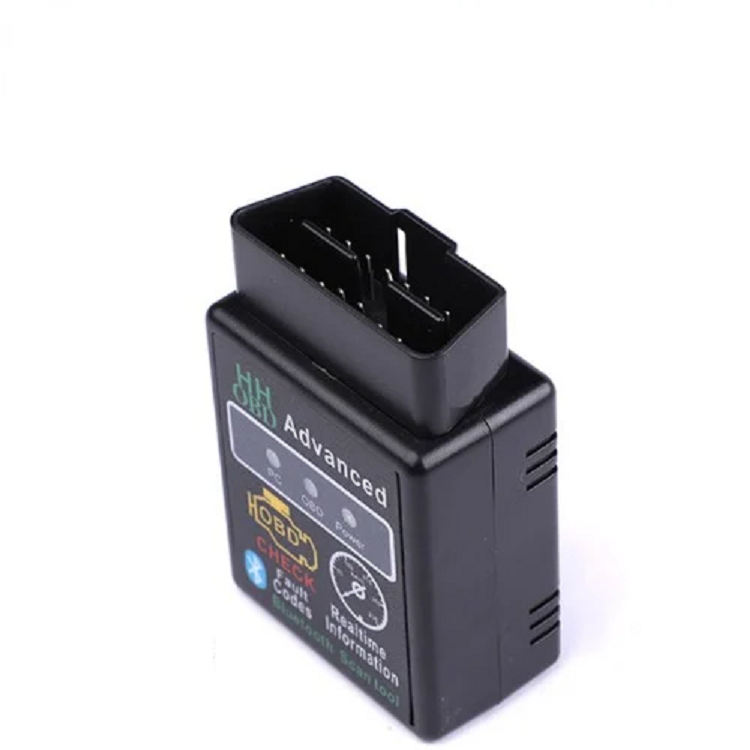
Here’s a step-by-step guide on how to read a car’s computer codes using an OBD2 scanner
- Locate the Diagnostic Link Connector (DLC):
- Every car produced in the last 25 years has a Diagnostic Link Connector (DLC). It’s a 16-pin connector where your OBD2 scanner plugs in.
- The DLC is typically found inside your car’s interior, often on the left side of the dashboard. Look for a flap that hides the connecting plug.
- If you’re having trouble locating it, consult your car’s owner manual.
- Connect Your OBD2 Scanner:
- Plug your OBD2 scanner into the DLC.
- Start your car’s ignition or put it in idle mode.
- You should receive a notification from your scanner indicating that the connection has been established.
- Enter Vehicle Information:
- Your vehicle has a unique Vehicle Identification Number (VIN). You can find it on a sticker next to the driver’s side door.
- Enter and confirm your VIN information on the OBD2 scanner’s screen.
- Access the Scanner Menu for OBD Codes:
- Once your OBD2 scanner is linked to your car, you’ll need to decide which system to diagnose.
- The scanner will display any pending codes (indicating issues like emission control system failures) and active codes (which trigger the check engine light).
- Remember that a pending code may become an active code if a problem repeats or is detected multiple times.
- Recognize Error Codes:
- Understanding the meaning of error codes is crucial. Fortunately, OBD2 scanners use a simple code format.
- Each code starts with a letter followed by numbers. Here’s what each letter signifies:
- P: Powertrain (fuel, emissions, ignition, transmission systems)
- B: Body (steering wheel, airbags, seatbelts)
- C: Chassis (axles, brake fluid, braking system)
- U: Undefined (components not covered by the first three categories)
- If you encounter a U error code, it’s best to seek professional diagnostics.
- Interpret the Fault Codes:
- Look up the specific code in your OBD2 scanner’s manual or online resources.
- Understand what the code indicates and whether it’s something you can address yourself.
- Some scanners provide additional context or potential fixes for each code.
- Erase Fault Codes (Optional):
- If you’ve resolved the issue or want to clear the codes, use the scanner’s menu to erase them.
- Keep in mind that erasing codes won’t fix the underlying problem; it’s essential to address the root cause.
Remember, using an OBD2 scanner becomes easier with practice. Familiarize yourself with the process, and soon you’ll be diagnosing car issues like a pro!
Learn more: How to Read Check Engine Light Codes
Choosing The Right OBD2 Scanner For Your Vehicle

Choosing the right OBD2 scanner for your vehicle is essential for accurate diagnostics and peace of mind. Let’s break down the considerations to help you make an informed decision:
- Compatibility:
- Ensure the OBD2 scanner is compatible with your vehicle’s protocol. Different cars use various communication protocols (such as CAN, ISO9141, or J1850).
- Check your owner’s manual, contact the manufacturer, or use an online database to determine your car’s protocol.
- Functionality Levels:
- Decide what level of functionality you need:
- Basic Code Reader: Limited features, mainly for notifying users about issues. Budget-friendly but may not work with all car models.
- High-End Models: Advanced features, confidence, and safety for drivers. These provide more extensive diagnostics
- Decide what level of functionality you need:
- Ease of Use:
- Consider the user interface. Some scanners have built-in displays, while others rely on smartphone apps.
- Choose one that you find intuitive and easy to navigate.
- Features:
- Look for features like:
- Live Data: Real-time information from sensors (engine RPM, coolant temperature, etc.).
- Readiness Monitors: Checks if your car is ready for emissions testing.
- Freeze Frame Data: Captures data at the time of a fault.
- Code Definitions: Provides explanations for diagnostic trouble codes (DTCs).
- Graphing: Visual representation of data.
- Update Capability: Regular software updates keep your scanner current.
- Look for features like:
- Build Quality and Durability:
- Invest in a well-built scanner that can withstand regular use.
- Consider the warranty and customer support offered by the manufacturer.
- Portability:
- Handheld OBD2 scanners are common, portable, and easy to use.
- They come with a built-in display screen, showing DTCs and their meanings.
- Budget:
- Set a budget and choose a scanner that meets your needs without overspending.
- Remember that a good scanner is an investment in your car’s health.
Remember, the right OBD2 scanner ensures accurate communication with your car’s onboard computer, helping you diagnose issues effectively!
Learn more:How to Choose the Right OBD2 Scanner.
Budget-Friendly OBD2 Scanners
If you’re looking for budget-friendly OBD2 scanners, here are some reliable options:
- Motopower MP69033:
- Priced at around $20, this scanner is a great entry-level choice.
- It provides basic error code reading and is straightforward to use.
- Ideal for DIY enthusiasts who want a simple solution.
- ANCEL BD310:
- Priced at approximately $78, the Ancel BD310 offers a good balance of features and affordability.
- It provides error code reading, live data, and readiness monitors.
- Suitable for home mechanics and car enthusiasts.
- Innova 1000:
- Priced around $95, the Innova 1000 is another budget-friendly option.
- It offers basic code reading and additional features like freeze frame data.
- A reliable choice for occasional use.
Remember that while budget-friendly scanners may have limitations, they can still provide valuable information about your car’s health. Choose one that fits your needs and budget!
Learn more:Best OBD2 Scanners for 2024.
Reading Live Data Using OBD2 Scanner
Reading live data from your car’s OBD2 scanner allows you to monitor real-time information about various parameters while your engine is running. Here’s a step-by-step guide on how to do it:
- Locate the OBD2 Port:
- Find the OBD2 port in your vehicle. It’s usually located under the dashboard, near the driver’s side footwell.
- Plug your OBD2 scanner into this port.
- Power On the Scanner:
- Turn on your OBD2 scanner.
- Select your vehicle make and model from the scanner’s menu options.
- Access Live Data:
- Look for a button or option labeled “Live Data” on your scanner.
- Press it to activate the live data function.
- Monitor Parameters:
- Once in live data mode, your scanner will display various parameters. Here are some common ones:
- Short-Term Fuel Trim (STFT): Indicates how the engine control unit (ECU) adjusts fuel delivery in real time. Optimal range: between -5% to +5%.
- Long-Term Fuel Trim (LTFT): Reflects long-term fuel adjustments. Also optimal between -5% to +5%.
- Engine Coolant Temperature: Should be between 70°C to 105°C.
- Engine Speed (RPM): Normal idle RPM is around 600-900 RPM when the engine is heated up.
- Intake Air Temperature: Varies by engine and load.
- Throttle Position: Ranges from 0% to 100%.
- Oxygen Sensor Readings: Voltage output for both Bank 1 Sensor 1 (between 0.1V to 0.9V) and Bank 1 Sensor 2.
- Calculated Engine Load: Varies by driving conditions.
- Mass Air Flow: Amount of air entering the engine in grams per second.
- Ignition Timing: Usually between 5° to 20°.
- Intake Manifold Absolute Pressure: Varies by engine and load.
- Charge Air Temperature: For turbocharged engines, varies by engine and turbocharger.
- And more!
- Once in live data mode, your scanner will display various parameters. Here are some common ones:
- Interpret the Data:
- Understand what each parameter represents and its optimal range.
- Abnormal readings may indicate issues that need attention.
- Troubleshooting:
- Use live data to diagnose problems, especially when the check engine light appears.
- Address issues early to improve fuel efficiency and engine performance.
Remember, OBD2 live data provides valuable insights into your car’s health. Regularly monitoring these parameters can help you catch potential problems before they escalate!
Learn more:How to Read OBD Live Data: Step-by-Step Guide.


